Chicken Bone Broth
Welcome to one of the oldest recipes in the book. We’re talking seriously ancient. As old as the earliest cooking vessels, if not older. Even if you’re sick and tired of hearing about bone broth (which happens to be one of the best things for the sick and tired) the bone broth trend is not going anywhere anytime soon.
Bone broth happens to be an incredibly thyroid-healthy recipe with gut-nourishing collagen, elastin, and gelatin, and several amino acids and minerals.
There are a million things you can do with bone broth, from soups to sauces to sipping broth. In this episode of Thyroid-healthy Bites, I’m going to show you just how easy it is to make bone broth a staple in your thyroid-healthy diet.
Full disclosure: Some of the links in this post may be affiliate links. As an Amazon Associate, I earn from qualifying purchases. Purchasing a product using one of these links will support my work at no additional cost to you. Please know that I only recommend products I wholeheartedly stand by.

Disclaimer: This information is for educational and inspirational purposes only. Always consult with your doctor or other qualified healthcare providers before making changes to your diet, health care, or exercise regimen.

Podcast Links:
- FREE Thyroid-healthy Grocery Guide
- Listen on the podcast page
- Subscribe on iTunes
- Follow on Spotify
- Subscribe on YouTube
- Subscribe on Google Podcasts
The Difference Between Broth and Stock
The terms bone broth and stock are essentially interchangeable. Broth, according to my culinary dictionary, is made from long-simmered meats and vegetables, while stock is essentially the same thing except that it features bones. The modern term ‘bone broth’ denotes broth made with bones. I prefer the term ‘stock’ because I think it’s more accurate, but they’re the same thing so call it what you like (as long as you get in the healthy habit of making it).
Stock Is Foundational to Healthy Home Cooking
Once you learn how simple, economical, and useful it is to keep stock on hand, it becomes a lifelong cooking skill. These primary cooking skills enable us to feed ourselves (and our families) real, nourishing food that comes from the earth, not a lab – a critical choice for those of us in search of better thyroid health.
In culinary school, stock is Lesson 1, because it’s the basis for so many things: soups, consommes, pan sauces, gravies, and even old-fashioned aspic (a savory gelatin). Very good stock (when chilled) will actually gel, and when heated and liquefied still has a slightly sticky quality that gives it a fantastic mouthfeel.
What Makes Chicken Bone Broth So Healing?
It’s that low and slow simmering that renders gelatin from connective tissues like cartilage. Other substances rendered include collagen, elastin, amino acids, and minerals – all of which give stock its richness and healing properties.
The same stuff that turns chilled stock to jelly nourishes our hair, skin, and nails. It’s like spackle to the microscopic cracks in our intestinal walls (aka leaky gut), which are so prevalent in those of us with autoimmune disease. And it is the same stuff that gives back to our joints what time, age, and wear-and-tear take out of them.
The medicinal value of broth is real and known across cultures. There are a thousand variations of stock, like Pho broth, flavored with star anise and cinnamon, or the broth I use for Chinese Jook (rice porridge), simmered with green onion tops and lots of garlic and ginger. But the recipe I will share with you today is a basic, all-purpose version.
Please note that while bone broth does supply many health-supporting proteins like collagen, proline, and glycine, it is not a complete protein like beef, fish, poultry, or eggs. Bone broth and collagen lack some of the nine essential amino acids required for protein synthesis, tissue repair, and nutrient absorption. To ensure you are getting complete protein, you can supplement bone broth with a whole source of animal protein like meat, poultry, seafood, or eggs.
What Goes in the Pot?
This is my standard recipe, and in the chilly part of the year, I make it about twice a month. I always keep a stasher bag or container handy in the freezer where I toss bones and fresh veggie scraps. If I happen to have an odd lamb bone, beef bone, or the bones from a roast duck, all the merrier. Some of my best batches have been made from a mixture of bones, so don't feel like this has to use chicken bones only.
When stock day comes, the whole lot gets tossed in. No need to adhere to rigid quantities, just fill the pot with water until its contents are covered.
Stock is a wonderful way to cut down on food waste, and save money. Here’s a list of some other things you can toss into the pot:
- Leek tops, thoroughly cleaned of silt
- Shallots
- Yellow onion skins, which give the stock a nice golden hue
- Green onions
- Fennel and fennel tops
- Mushrooms and mushroom stems
- Ginger (depending on what you're going to make with the stock)
- Mellow herbs like tarragon, thyme, chives, or parsley in small to moderate quantities
- Stronger herbs like rosemary or sage in small quantities
- A wee bit of something acidic such as vinegar, wine, lemon juice, or tomato paste.
View this post on Instagram
Cooking, Straining, and Storing Your Bone Broth
Once everything's in the pot, turn on the heat and let it come up to a very low simmer. Just the occasional bubble rising to the top is the target. It's that slow and low cooking that will help coax the goodness from the bones.
Leave it to simmer, covered, for at least 8 and up to 24 hours if possible. Stirring it occasionally is fine but not necessary.
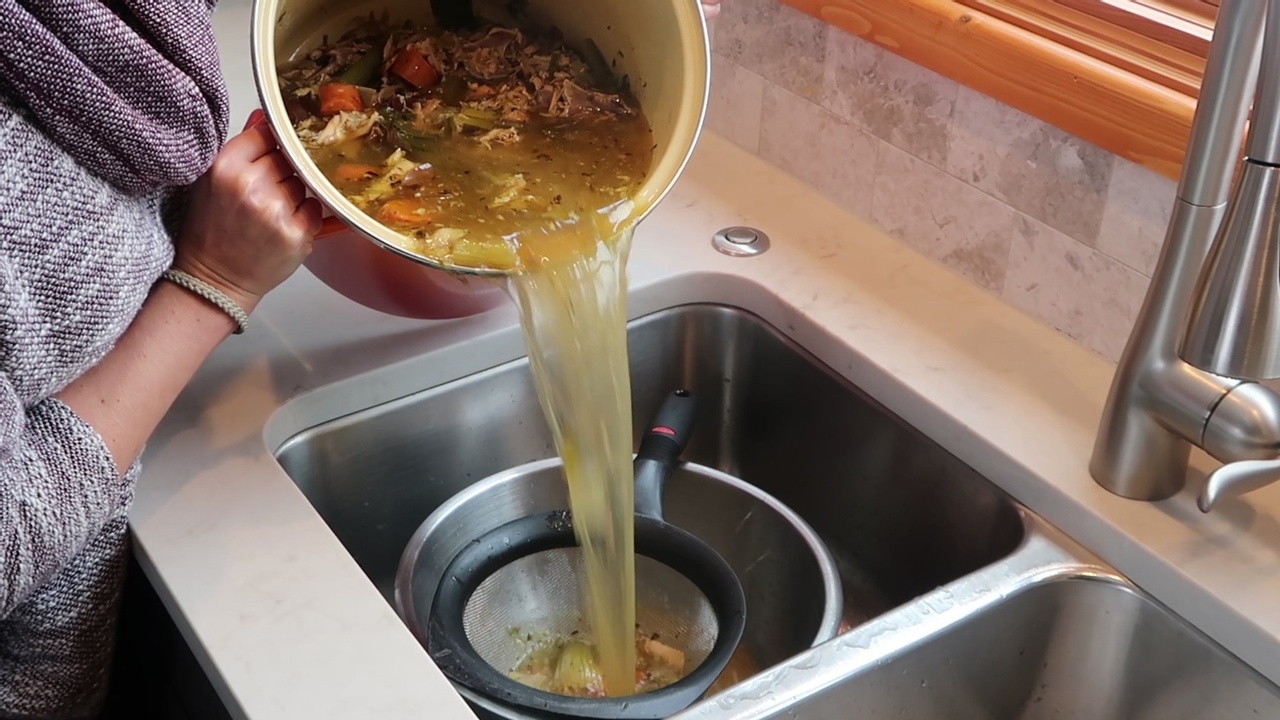
When it's time to drain your bone broth, place a strainer over a large bowl or pot and carefully pour it in (as pictured).
Cool the broth by placing it into a sink filled with lots of ice and water so that it comes about 2/3 of the way up the side of the bowl or pot.
At this point, I like to cover the broth and refrigerate it overnight. This lets all the rendered fat rise to the top and solidify, making it easy to remove and discard the next day. Because the fat in bone broth is simmered for so long, it's highly oxidized and is not recommended for cooking purposes. If you don't have time to chill your broth overnight, skim the fat with a ladle or gravy strainer.
From there, I pour the strained, chilled, and skimmed broth into quart-size Pyrex containers and store in the freezer for up to 2 months. At our house, bone broth never seems to stick around that long because there are so many uses for it, and all of us, especially my kiddo, love to sip it plain.
Happy thriving, and enjoy the episode!

P.S. If you're anything like me, when I started down the path of thyroid-healthy eating I had questions-- lots of them. What I didn't have was a step-by-step system, to get me where I wanted to go. I wasted a lot of time piecing together bits of information about what to eat, what to avoid, and HOW to make thyroid-healthy dietary changes. That’s why I created the Thyroid-healthy Meal Plan Kickstart. Ready to take YOUR healing journey farther, FASTER? Let’s do it. Learn more HERE.

Use Chicken Bone Broth in These Thyroid-Healthy Soup Recipes:
- Tomato, Sausage, and Fennel Soup
- Hoppin' John Soup
- Turkey Albondigas Soup
- AIP Zucchini Basil Breakfast Soup
- Red Lentil Rainbow Soup
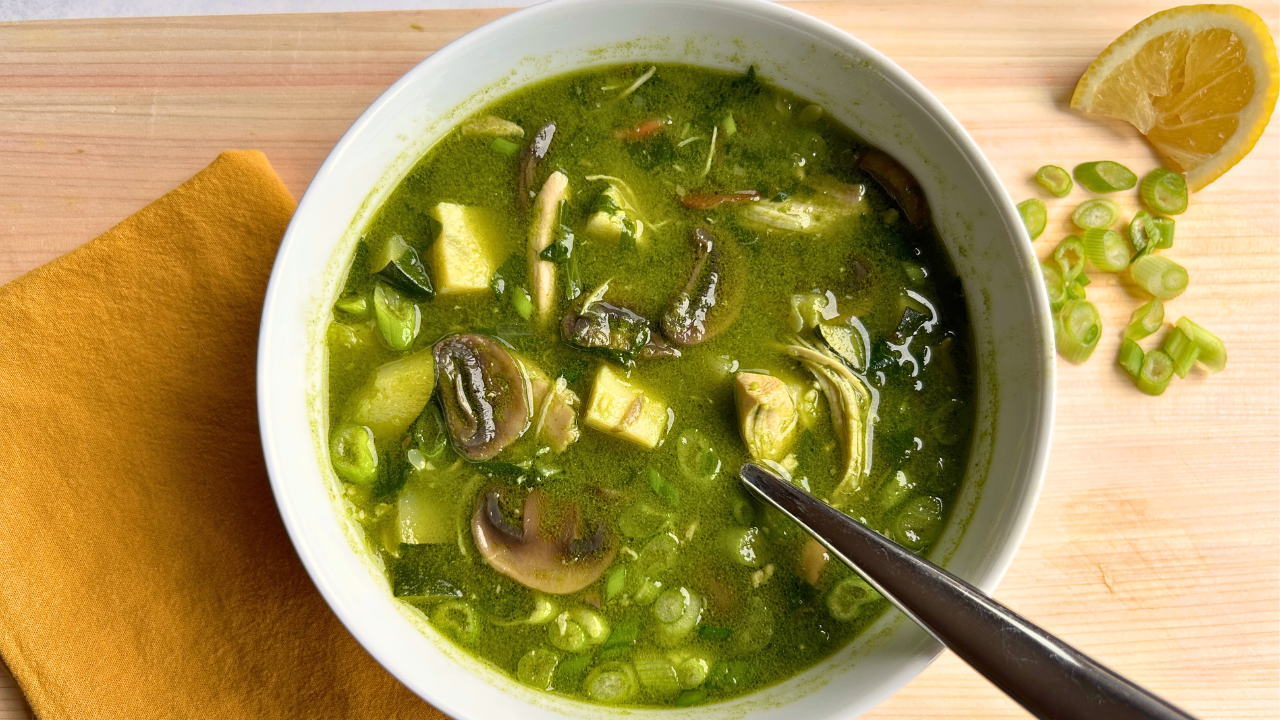
- Thai Chicken Soup
- Split Pea Soup with Smoked Ham
- Italian Sausage Minestrone
Subscribe to my free newsletter for fresh recipes & lifestyle tips, delivered weekly, and receive a free gift!
By submitting this form, you agree to receive ongoing updates from Hypothyroid Chef